Imagine a dessert that whispers of rich coffee, sings with creamy mascarpone, and melts in your mouth with the delicate embrace of ladyfingers. That, my friends, is the magic of authentic Italian Tiramisu. It’s more than just a dessert; it’s an experience, a journey to the heart of Italy with every spoonful. This recipe captures the true essence of this classic, and I’m thrilled to share it with you. Get ready to create a little piece of Italian paradise in your own kitchen!
Ingredients You’ll Need
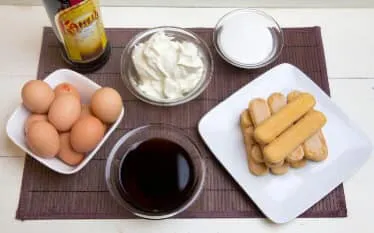
To create this delightful Tiramisu, gather these fresh and simple ingredients:
For the Coffee Bath:
- 1 ½ cups strong brewed coffee, cooled (espresso is highly recommended for the most authentic flavor)
- 2 tablespoons granulated sugar (adjust to your sweetness preference)
- 1 tablespoon coffee liqueur (such as Kahlúa) or dark rum (optional, for an extra layer of depth)
For the Mascarpone Cream:
- 6 large egg yolks (use the freshest you can find)
- ¾ cup granulated sugar
- ½ teaspoon vanilla extract
- 1 ½ cups mascarpone cheese, at room temperature (this ensures a smooth, lump-free cream)
- 1 ½ cups heavy cream, chilled
For Assembly:
- Approximately 24-30 ladyfingers (savoiardi biscuits – their porous texture is perfect for soaking)
- Unsweetened cocoa powder, for dusting
Equipment You’ll Need
Before we begin, make sure you have these essential tools ready:
- A shallow dish for the coffee mixture
- A heatproof bowl and a saucepan for the egg yolk mixture
- An electric mixer (handheld or stand mixer)
- A spatula for folding
- A serving dish (a 9×13 inch dish works well, or individual serving glasses)
- A fine-mesh sieve for dusting cocoa powder
Step-by-Step Preparation: Crafting the Layers of Flavor
Let’s walk through the process of creating each component of our Tiramisu.
Preparing the Coffee Bath
In your shallow dish, combine the cooled strong brewed coffee and granulated sugar (if using). Stir until the sugar is completely dissolved. If you’re adding coffee liqueur or dark rum, stir that in now. The aroma alone is a delightful preview of what’s to come!
Pro Tip: Make sure your coffee is completely cool before dipping the ladyfingers. Warm coffee will make them soggy too quickly.
Making the Zabaglione Base
In your heatproof bowl, whisk together the egg yolks and granulated sugar. Place the bowl over a saucepan of simmering (not boiling) water, ensuring the bottom of the bowl doesn’t touch the water. Whisk constantly for about 5-7 minutes, or until the mixture becomes pale yellow, thickens slightly, and leaves a ribbon trail when the whisk is lifted. This process, called making a zabaglione, gently cooks the yolks and creates a rich base for our cream. Remove the bowl from the heat and whisk in the vanilla extract. Set aside to cool completely.
Creating the Mascarpone Cream
Once the zabaglione base is completely cool, gently fold in the room-temperature mascarpone cheese until you have a smooth and creamy mixture. It’s important that the mascarpone is soft to avoid any lumps.
In a separate clean bowl, whip the chilled heavy cream using your electric mixer until stiff peaks form. Be careful not to overwhip, as this can turn the cream grainy.
Now, gently fold the whipped cream into the mascarpone mixture in two or three additions. This technique helps to keep the cream light and airy, which is essential for the perfect Tiramisu texture.
How to Assemble the Tiramisu: Layer by Layer of Delight
Now for the fun part – putting it all together!
- Soaking the Ladyfingers: Dip each ladyfinger briefly into the cooled coffee mixture, ensuring both sides are moistened but not saturated. They should still hold their shape.
- First Layer: Arrange a layer of the coffee-soaked ladyfingers in the bottom of your serving dish, covering the entire surface. You might need to break some ladyfingers to fit snugly.
- Creamy Embrace: Spread half of the mascarpone cream evenly over the layer of ladyfingers.
- Second Layer: Repeat with another layer of coffee-soaked ladyfingers.
- Final Creamy Cloud: Spread the remaining mascarpone cream evenly over the second layer of ladyfingers.
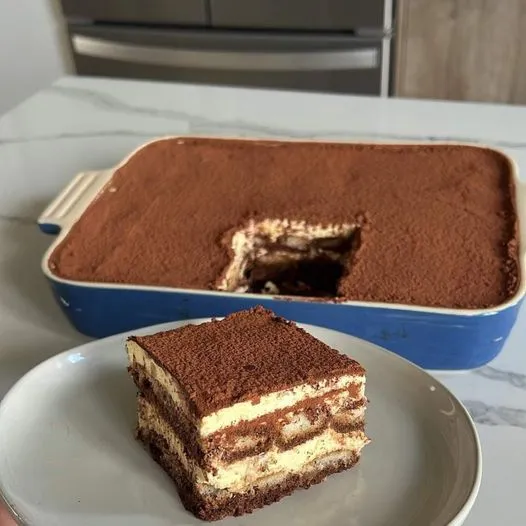
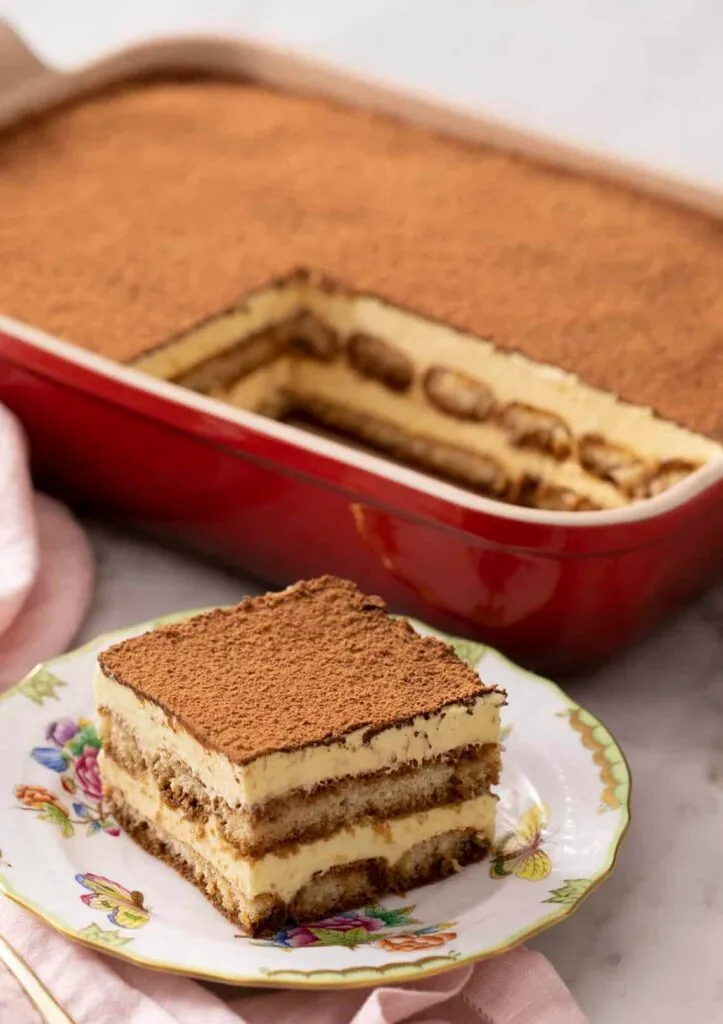
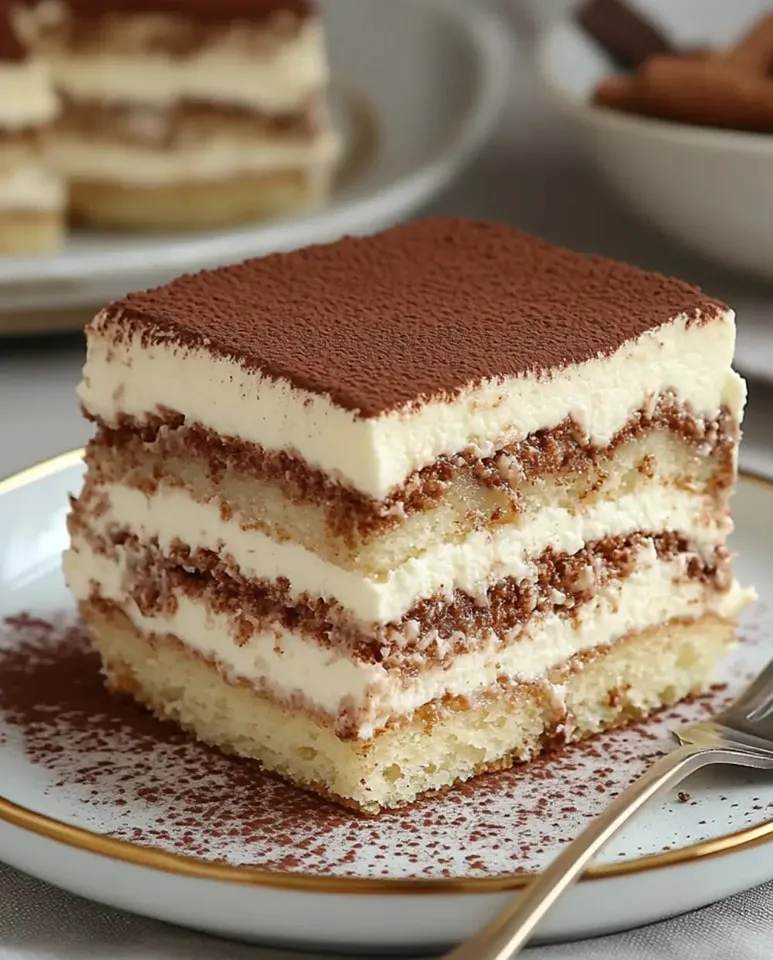
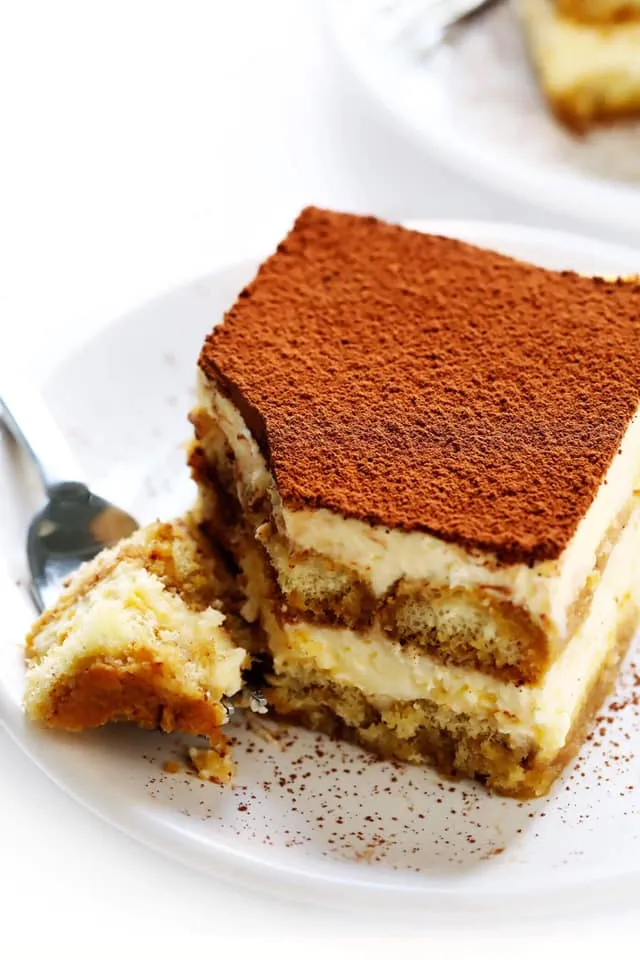
- Dusting of Elegance: Using your fine-mesh sieve, generously dust the top of the Tiramisu with unsweetened cocoa powder. This adds a beautiful visual finish and a delightful hint of bitterness.
Serving Suggestions: Enjoying Your Creation
The beauty of Tiramisu is its simplicity, but here are a few ways to elevate the serving experience:
- Chill Thoroughly: For the best flavor and texture, chill your assembled Tiramisu in the refrigerator for at least 4 hours, or preferably overnight. This allows the flavors to meld and the ladyfingers to soften perfectly.
- Individual Servings: For a more elegant presentation, serve the Tiramisu in individual glasses or ramekins.
- Garnish (Optional): You can garnish with a sprinkle of chocolate shavings, a few fresh berries, or a dusting of powdered sugar just before serving.
Storage Instructions: Keeping it Fresh
Leftover Tiramisu can be stored in an airtight container in the refrigerator for up to 3-4 days. The flavors might even deepen a bit overnight!
Pro Tip: Avoid freezing Tiramisu, as the texture of the mascarpone cream can change and become grainy upon thawing.
Final Thoughts: A Taste of Italy at Home
There you have it – your very own authentic Italian Tiramisu, ready to be enjoyed! This recipe is a testament to the fact that sometimes, the simplest ingredients, when combined with care and a little bit of love, can create the most extraordinary results. I hope you enjoy making and sharing this classic Italian dessert as much as I do. Buon appetito!


